
Painting a room is a popular project for beginning DIYers and veteran renovators alike. After all, it’s pretty painless, relatively inexpensive, and should something go horribly wrong, easy to fix. But before you grab your roller and get started, it’s important to have a plan of attack. Read on to learn how to paint a room and see the steps you’ll need to follow to make sure your project is a success.
1. Plan your approach
Start by thinking about how you want the finished project to look and remember that you’re not limited to four walls in the same color. Consider painting an accent wall in a bold hue or highlighting moldings in a contrasting shade or finish. And don’t forget to look up and see whether the ceiling could use a refresh as well.

2. Choose your color
Browsing through fan decks and paint chips can be overwhelming. Start by figuring out the general color characteristics: Do you want a warm or cool shade? A neutral or a saturated shade? If you have existing furniture or art, you’ll also want to consider how the shade will compliment them. Once you have a sense of what you’re looking for, pick a few shades and get samples. Test the shades to see how they look in the room at different times of day.
Many paint companies also have tools on their websites that will let you upload a photo of your space and preview different colors on the walls. But colors can look different in real-world conditions, so you’ll still need to try it out in the space.

3. Pick out your tools and materials
Every project is unique and you may need different tools depending on the paint you choose and the condition of your walls, but there are a few must-haves.
- Paint
- Paint roller
- Paint roller extension pole
- Drop cloths
- Paintbrushes
- Paint tray
- Sandpaper
- Painter’s tape
- Rags
- Putty knife

4. Determine how much paint you'll need
Whether you’re painting a powder room or the exterior of your house, the general rule of thumb is one gallon per 400 square feet. But that’s just a rough guideline: To get a more precise number, which you’ll definitely want for large projects, use a paint calculator like the ones provided by Benjamin Moore or Pratt & Lambert; they take into account window and door measurements. (And both assume two coats of paint per project.)
Planning on whitewashing a charcoal-gray wall? You’ll likely need additional paint when going from dark to light. On the other end of the spectrum, a deep color base tends to require more coats of paint than a lighter color. It is recommended to apply a gray tinted primer to the surface before you paint your walls a saturated color to help reduce the number of applications. When it comes to finish, you may have heard the glossier it is, the higher the coverage rate, but it’s not enough of a difference to change the number of gallons you need to buy. If you’re painting a highly textured surface rather than a smooth one, buy a little extra. Cabinets with complicated millwork require more paint, too; it recommended to purchase about 10 percent more than calculated.
Planning on whitewashing a charcoal-gray wall? You’ll likely need additional paint when going from dark to light. On the other end of the spectrum, a deep color base tends to require more coats of paint than a lighter color. It is recommended to apply a gray tinted primer to the surface before you paint your walls a saturated color to help reduce the number of applications. When it comes to finish, you may have heard the glossier it is, the higher the coverage rate, but it’s not enough of a difference to change the number of gallons you need to buy. If you’re painting a highly textured surface rather than a smooth one, buy a little extra. Cabinets with complicated millwork require more paint, too; it recommended to purchase about 10 percent more than calculated.

5. Prep the walls and the room
You don't want to damage your favorite sofa or that heirloom Grandma gave you, so empty the room of all the furniture. If you don't have enough space, push everything to the center. Cover the pieces with a drop cloth or lightweight plastic sheeting and do the same with the floor. Don't skip the drop cloth, paint will splatter.
Grab a roll of painter's tape and firmly apply it to the edges of the room's corners, base and crown moldings, and door and window casings, using a putty knife to seal if needed. Getting a good seal so paint doesn't get under the tape is everything, plus it will pull away clean after everything is dry. If you dare (or have an artist's steady hand), you can skip taping entirely. Remove outlet and light switch covers and apply painters tape to protect outlets and switches from paint drips.

6. Mix your paint

7. Pick your painting techniques
Your paint is mixed and your roller is at the ready, but make sure to plan a strategy before you get started. Work from the top of the room down, starting with the ceilings. Planning a bold focal wall? Paint the adjoining light-color walls first. Don't worry if you get paint on what will be your accent wall—the dark paint will cover up whatever lighter paint found its way there. After the lighter wall dries, tape off that edge so the dark color doesn't bleed onto your new paint. If you're covering up dark walls with a brighter hue, plan on three coats: your primer, plus two coats of the new color to ensure nothing shows through.
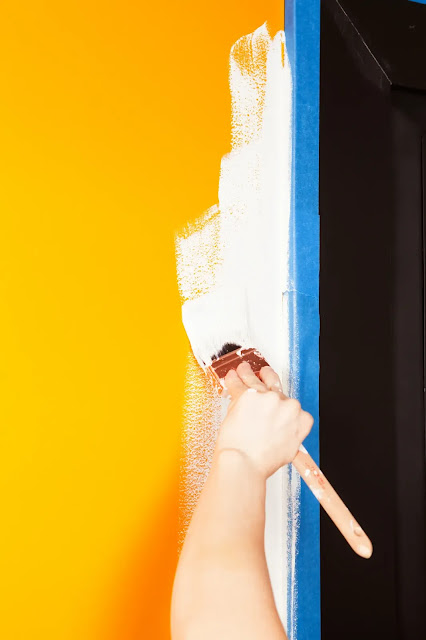
Tackle one wall at a time. Take a brush and "cut in"—paint along the molding and the corners from top to bottom—while your friend uses a roller to cover the main expanse of the wall, staying away from those more precise spots. When applying paint with the roller, use long strokes in a W pattern for ample coverage (and to avoid those pesky roller marks). Once the wall is dry to the touch, it's ready for a second coat.
If you are painting the trim, remove the painter’s tape and wait for the walls to dry, before applying tape to the walls. Start with the trim closest to the ceiling, moving on to door and window frames, and finally the baseboards.
8. Don’t forget ventilation
Make sure your space is well-ventilated throughout the project by opening windows and using fans.Keeping the room warm and a fan blowing definitely helps speed up the drying process. If it's a damp day, it will take much longer for the paint to dry.

9. Clean up
You’ve done multiple coats, but it’s not time to relax just yet. Remove all painters tape and gather drop clothes, making sure any spills or splatters are dry before you move them. For latex- and water-based paints, clean brushes with soap and water, while oil-based paints will require mineral spirits. You can use a painter’s brush to clean and reshape bristles. If you want to reuse roller covers, use the curved edge of a 5-in-1 tool to remove the paint under running water.

10. Give yourself enough time
The amount of time your project will take depends on the size of your room, how you’re painting, and your skill level. For instance, using a dark shade on the walls and painting the ceiling and trim will take longer than just doing the walls in a neutral. While some spaces can be done in a few hours, others may take several days. Be sure to budget more time than you think the job will need and don’t forget to take prep and cleanup into account.
********************************************************************
Are you interested in selling or buying your home in the next few months? Work with award winning realtor, Carmen Leal and her team that specialize in Real Estate Vancouver and have qualified Buyers that are looking for a home in your area! 604.218.4846 & www.carmenleal.ca

This communication is not intended to induce breach of existing listing agreement.
No comments:
Post a Comment